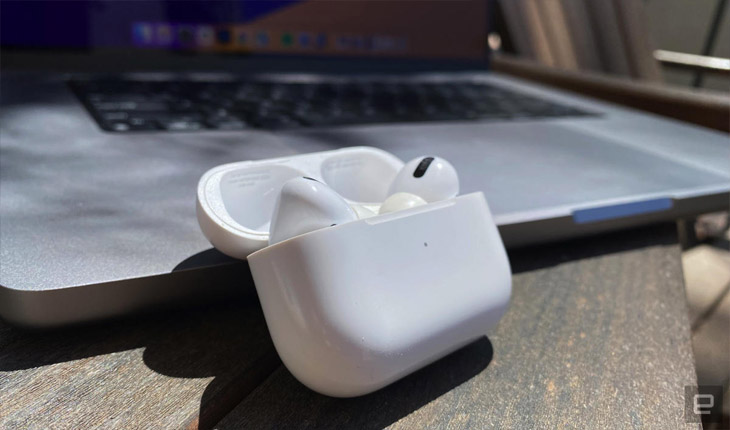
Looking to figure out how to link your AirPods to your laptop? You’ve come to the right spot. Setting up the top AirPods for your MacBook – or any other Apple gadget, for that matter – is surprisingly straightforward. All you need to do is take off the case with the AirPods inside, hold it close to your device, and follow the instructions. It’s a hallmark of Apple, making it effortless for its devices to communicate with each other, allowing you, the user, to mostly just chill. How to Connect your AirPods to a Laptop
Tying your AirPods to the top laptop or top Chromebook… well, that’s a bit different from setting up the top MacBooks because Apple devices aren’t made to easily connect with other brands. At least, not as easily.
But, a set of AirPods – whether they’re an older version or the newest model – employs Bluetooth technology, which means you can definitely link them to your Windows laptop as long as it supports Bluetooth. And the steps to do so are pretty much the same as pairing any other headphones to any other laptop.
STEPS FOR HOW TO CONNECT AIRPODS TO A LAPTOP
- Put your AirPods in pairing mode
- Open Bluetooth settings on your laptop
- Add a Bluetooth device on your laptop
- Select your AirPods to pair
How to connect AirPods to a laptop
If you’re connecting your AirPods for the first time or they’re not currently paired with any device, you need to open the case with both AirPods inside, locate and press the pairing button on the back – or the noise control button for AirPods Max – to initiate the pairing process. Keep holding the button until the status light turns white and flashes (this indicates that you’re in new pairing mode).
Next, head to your computer and open the Settings app. Look for ‘Bluetooth & devices’ and click on ‘Devices’ for your Windows computer, or type ‘Bluetooth’ in the ‘Search Bar’ next to the Windows icon to open it faster. Within this window, find the option labeled ‘Connect a new device’ and tap ‘Add device’.
A new, smaller window will appear, giving you the option to select the type of device you wish to add. Choose Bluetooth. This will display a list of devices that are in pairing mode. If your AirPods are in pairing mode, they should appear on this list. Choose your AirPods from the list, and it should connect within a matter of seconds.
STEPS FOR HOW TO CONNECT AIRPODS TO A CHROMEBOOK
- Put your AirPods in pairing mode
- Open Quick Settings on your Chomebook
- Select your AirPods to pair
How to connect AirPods to a Chromebook
In order to link your AirPods to your Chromebook, you’ll need to activate your Apple headphones in pairing mode. This will make them show up as a Bluetooth device, allowing you to connect your AirPods. Continue with the steps outlined below until the LED light on your headphones begins to flash white, signaling that they are in pairing mode and are ready to connect to a Bluetooth device.
On your Chromebook, navigate to the time at the bottom right-hand corner of the screen. This action will open the Quick Settings panel, which will expand in the corner of the screen, revealing your connection settings, including those for Wi-Fi and Bluetooth. Locate the Bluetooth icon, which will open a new window displaying all connected devices, followed by the “+” symbol to initiate the pairing process.
A new window should appear in the center of your screen with additional guidance on how to pair devices to your Chromebook. This window will display all devices within range that are available for connection. Select your AirPods to begin the pairing process. Once your AirPods are successfully paired, the window will close on its own.
STEPS FOR HOW TO CONNECT AIRPODS TO A MACBOOK
- Put AirPods in pairing mode or pair via iCloud
- Open Bluetooth settings on your MacBook
- Select your AirPods to pair
How to connect AirPods to a MacBook
If your AirPods are already paired with an iPhone or iPad that’s signed into your iCloud, they’ll automatically sync with any MacBook or other Mac that’s signed in too. This means your AirPods will pop up in the Bluetooth settings on your MacBook, even if you haven’t turned Bluetooth on yet.
If you haven’t linked your AirPods to an iOS device before, there’s an easy method to get them connected to a MacBook without removing them from their charging case. Ensure Bluetooth is enabled in the settings on your MacBook, then place your AirPods in pairing mode. They’ll show up in the Bluetooth settings, and you can simply press the ‘Connect’ button to finish the pairing.
After linking your AirPods, a new ‘Options’ button will appear beside the Bluetooth icon at the top of your screen. Click on this button, and you’ll find various settings for your AirPods, like tweaking Active Noise Cancellation, Transparency, and volume.
Why are my AirPods not connecting to my laptop?
If your AirPods are not connecting to your laptop, the issue may stem from several possible causes. One common reason is that Bluetooth connectivity might be turned off or malfunctioning on your laptop. First, ensure that Bluetooth is enabled and that your AirPods are in pairing mode. You can check the Bluetooth settings on your laptop to verify this. Sometimes, restarting the Bluetooth service or your laptop can resolve temporary connection issues.
Another potential cause is interference or a poor Bluetooth connection. If there are multiple devices connected to your laptop or too many Bluetooth signals nearby, it can cause interference that disrupts the connection between your AirPods and the laptop. Try disconnecting other Bluetooth devices or moving to an area with less wireless interference. You could also try unpairing your AirPods from the laptop and pairing them again to refresh the connection.
Lastly, your AirPods might not be compatible with certain software or Bluetooth versions on your laptop. Ensure that your laptop’s operating system and Bluetooth drivers are up to date, as outdated software can sometimes prevent devices from connecting properly. If all else fails, resetting your AirPods by holding the setup button on the case for about 15 seconds might resolve deeper connection issues and allow them to pair with your laptop once more.