
Allowing camera access on Snapchat is essential for using the app effectively. Without this permission, you can’t capture photos or videos. Many users struggle with enabling this feature. In this blog post, we’ll guide you through the steps to grant camera access. We’ll ensure you can start snapping and sharing in no time. Let’s get started! How to Allow Camera Access on Snapchat
First, open the settings on your device, whether you’re using an iPhone or Android. For iPhone users, scroll down to find Snapchat in the list of apps, tap on it, and then toggle the camera access to “On.” If you’re using an Android device, go to Settings, select Apps, find Snapchat, and then tap on Permissions. Here, you will see options for Camera, which you need to enable. Once you’ve granted the necessary permissions, return to the app, and you should be ready to start taking photos and videos effortlessly!
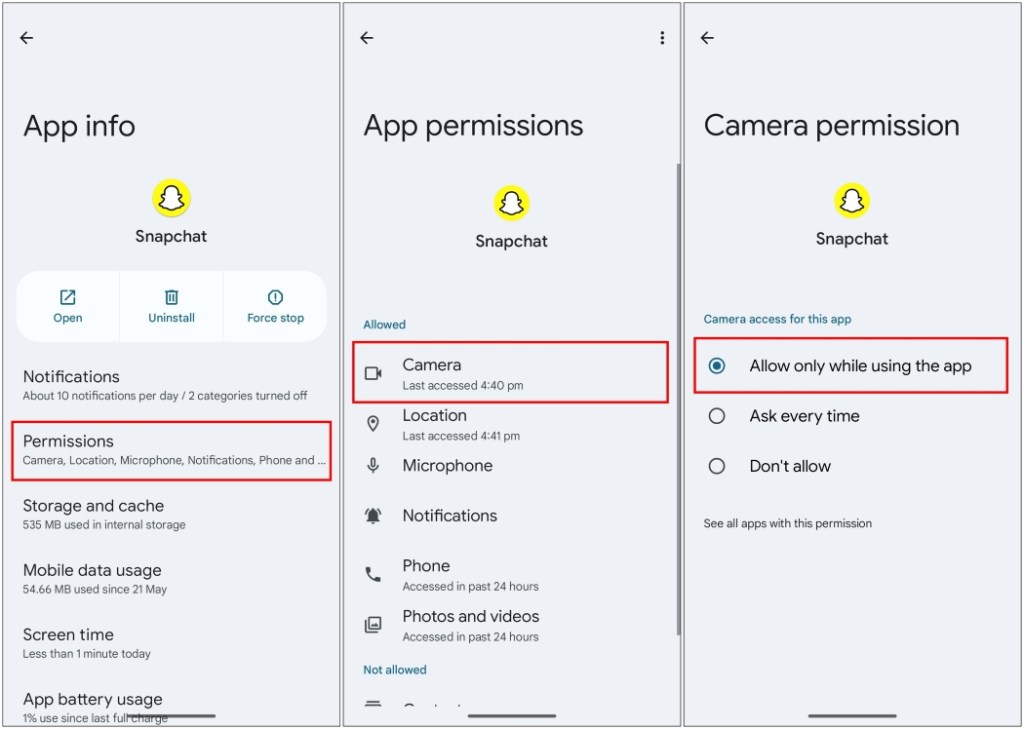
When you first install Snapchat on your phone, the app will prompt you to grant it camera access, as it is an essential component required by the app to function normally. If you dismissed or accidentally pressed the wrong button, then you can allow camera access to the app from settings. Here’s how you can do that.
- Open the Settings app on your Android phone.
- Go to Apps > All Apps and select Snapchat from the list of apps.
- Here, go to Permissions > Camera.
- Then select the Allow only while using the app option.
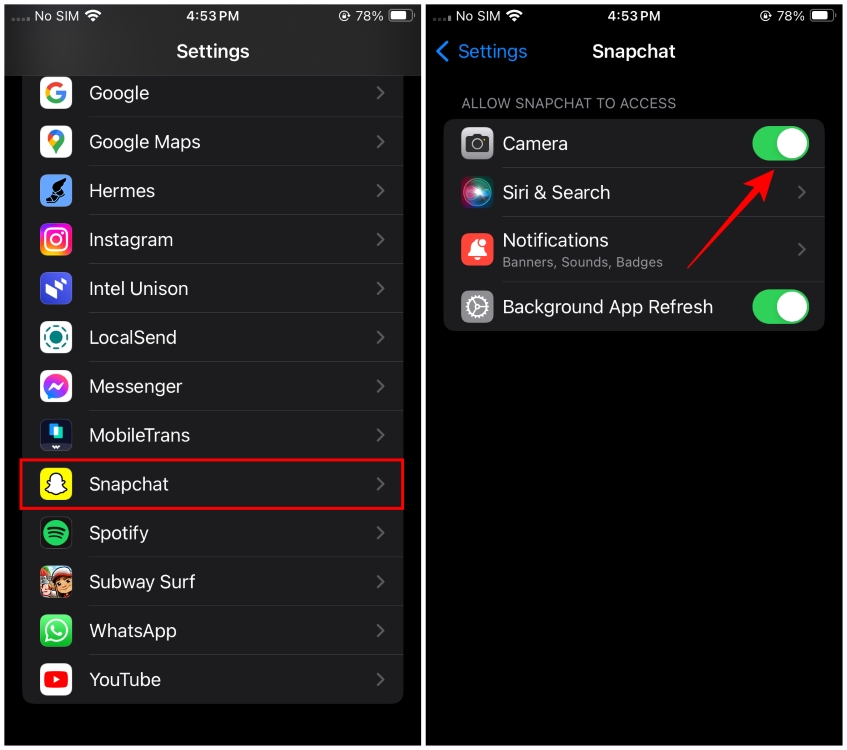
Provide Camera Access to Snapchat on iOS
The process is similar to providing camera access to the iOS version of the Snapchat app. You just have to navigate to the settings app and enable the permission. Let’s take a look at the complete steps.
- Head over to Settings > Snapchat.
- Now, turn on the Camera toggle under “Allow Snapchat to Access”.
Allow Webcam Access for Snapchat Web
For individuals utilizing the web version of Snapchat and encountering challenges with allowing camera access to the site, you can follow these straightforward instructions. Ensure that your webcam is functioning properly before proceeding with the steps. Let’s review the steps together.
- Head over to Snapchat Web and click on the site information icon on the left side of the address bar.
- From the drop-down menu, click on Site settings.
- Here, click on the box next to Camera and select Allow or Allowed (depending on the web browser you’re using).
- Now, click on Reload to refresh the webpage and apply changes.